Working Remotely From Another Country: US Guide
Embrace the flexibility of remote work with our guide on working remotely from another country. Gain insights into legal considerations and optimize your remote

If you’re just starting out as a freelance writer, you’ll need to get used to the process of creating, sending and - occasionally - chasing client invoices. By making the process of creating your invoices simple with your own template, you’ll save yourself time and create a strong professional impression with your clients.
Make it simple for customers to understand the invoice - and straightforward for them to make payment, so you don’t face any unnecessary delays. Here’s how.
There are some key pieces of information which need to be included in your invoice, no matter who you’re billing, and what type of work it is. Here’s a rundown:
It may seem obvious, but your client probably has multiple invoices to settle at the end of every month.
Make sure yours is easily identifiable by including your name and contact details in a prominent position at the top of the invoice template.
If you have one, include your logo as a header your invoice template to create a professional look.
To avoid ambiguity, include the name and contact details of the client you’re sending your invoice to.
If you’re billing a large organisation, the chances are that the invoice will pass from your contact, to an accountant or accounts department. The accounts team are likely to need a way of identifying who the invoice was sent to, for their own records. Make things simple by including this detail close to your own personal contact details in your template.
Make sure the date is clear and prominent, and include a line about your payment terms - say ‘Payable within 30 days’ for example. This information will help you organise invoices when preparing your tax filings, and allow both you and the client to easily see when the amount becomes due according to your payment terms.
Include an invoice number in this section, too, so you can keep track of each invoice sent to an individual client.
You’ll need to give a breakdown of the work you’re billing for, including the agreed payment per word, or per item. This is easily done in a table format underneath the core information detailed above.
Make sure each item is easily identified by the client to make it simple for them to check. If you’re writing articles or blog posts, for example, you can include the title of each, along with agreed wordcount and cost per word, or unit price, depending on your client agreement.
Don’t forget to include an invoice total beneath the service breakdown. This allows you to check what payment you’re expecting, and reduces the client’s admin, making it easier for them to pay.
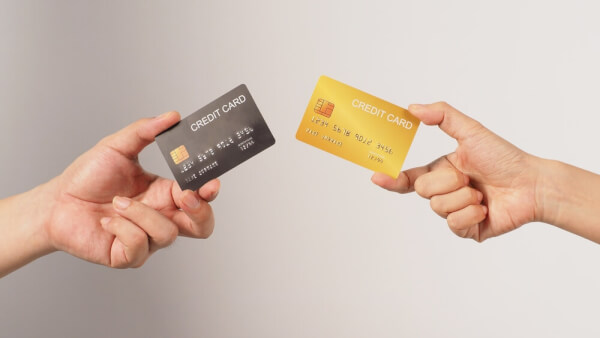
One of the most important details to include on your invoice is explicit and simple payment instructions. Explain how you want to be paid - and make sure you give your client everything they need to pay you, to avoid delays. For example, if you accept payment using PayPal, you’ll need to specify the PayPal account details needed. If you would rather a wire transfer to your regular bank account, ensure you include your routing number, bank address and account number.
Working with overseas clients? In this case you may choose to accept payments in your client’s currency rather than dollars to make it easier for them to pay. If you’re invoicing in a foreign currency, it’s worth getting a specialist account to receive payments in, rather than relying on your regular bank.
Traditional banks can often charge fees for receiving and converting international payments, which means you lose out. Instead, by using a specialist account such as the Wise borderless account for freelancers, you can cut the costs of managing your money across borders - keeping more of your income for yourself.
With the borderless account you’ll get your own local bank details for US, Australian and New Zealand dollars, British pounds and euros, which means you pay no fees for invoices received in these currencies. You can then choose to hold or spend your income from the borderless account, or convert it all back to dollars and withdraw it back to your regular account. Currency conversion is always done using the mid-market rate, with just a low transparent fee to pay. This can make it quick, cheap, and simple to reach a global client base, and grow your freelance writing business.

You can create a simple client invoice template using your preferred word processing tool, such as Google docs or Microsoft Word. It makes sense to send it in a PDF format to your client, as this document type is pretty much universally compatible, compact and professional looking.
If you’d rather use a specific software solution for invoicing, this is also possible. You can create invoices directly from your PayPal account if you prefer to receive payment that way, or choose an invoicing solution such as the free invoice generator tool from Wise.
There are also many other invoicing solutions available, which allow you to create custom invoices, but you may incur a fee, either to use the package, or as a percentage of the invoice cost if you choose to take online payment via the provider’s software. Check out solutions such as Wave or AND CO to get an idea of the sort of services available.
Let’s finish up with a few tips to help you reduce your admin time, and still get paid quickly.
Optimize invoicing to be fast, so you can spend more time doing what you do best - writing. Use templates and set a time to do all your invoicing in a batch, to make it more manageable.
Unless you have very specific invoicing needs, you may save time by using familiar software such as Word or Google docs to make your invoice - the end result is still professional and it saves you learning a new application to get started.
Create a memorable invoice, to stay front of mind when clients are selecting partners for future work. Use your logo, a striking typeface or other unique brand identifier to stand out.
Ask your client for their preferences when creating your invoice - how would they prefer the work to be broken down and itemized, for example.
Make services and fees as clear as possible, detailing how many units of work were completed - words, hours, pages - as well as your rate (dollars per hour, or price per word for example), to make it easy to clear any mistakes.
Cite your terms - don’t forget to clarify when the payment is due to avoid misunderstandings.
Check the invoice one last time for all key information, before sending it out.
Making it easy for your clients to pay is simply good business sense. By creating a professional invoice you can build your brand, be more memorable, and get paid quicker. It’ll also reduce your admin time and leave you with more space to create - and earn money.
Remember to also think about how you receive payments to reduce the burden of bank fees. If you’re going to be working with international clients, offering local currency billing, and using a Wise borderless account for freelancers to receive payments, can cut your costs, and give you a competitive edge.
*Please see terms of use and product availability for your region or visit Wise fees and pricing for the most up to date pricing and fee information.
This publication is provided for general information purposes and does not constitute legal, tax or other professional advice from Wise Payments Limited or its subsidiaries and its affiliates, and it is not intended as a substitute for obtaining advice from a financial advisor or any other professional.
We make no representations, warranties or guarantees, whether expressed or implied, that the content in the publication is accurate, complete or up to date.

Embrace the flexibility of remote work with our guide on working remotely from another country. Gain insights into legal considerations and optimize your remote

Looking for a good time-clock app for your small business? No problem. Let's take a look at the best free and paid apps for you and your team.

Money-making apps consist of a few categories: Long-term freelancing apps, short-term task apps, delivery and taxi apps, and apps to sell your stuff.

1) Wise: Independent Contractor Account 2) Wonolo: Freelance Job Platform 3) TurboTax: Tax app 4) DoorDash: Deliver App 5) Fantastical Calendar: Free App

As long as you know how to market your skills and rates, you'll be able to profit quickly from Upwork. Let's jupm
Best Cards for Self-Employed and Freelancers: There are various cards from Ink, Chase, Capital One, Wells Fargo, and Bank of America. Find the best one for you